
OD~66
The name comes from the combination of the OverDrive in the Amp (the fact you can cascade the two triodes in the preamp.) and the fact that the amp is using kt66's as its output tubes.
This amp, as evidence by the chassis has gone through many changes (and needs a new chassis).
It started out life as a jtm45 clone, and it did a great job at that. Then a friend of mine that
was using it, while he was playing it in the band I'm in, noted what's the use of the second channel,
he didn't like the jumpered channel sound, and also is there a way to get more gain in it, and also
keep the clean sound too.
So Off I want. Changed the tube rec to SS (the diodes are mounted on the 8 pin socket, since everything was wired to there), and I installed a second transformer for the switching circuit and a crude PS and switching relay that worked. All was will till he quit the band.
after awhile the other guitarist stared using it, and he liked it, but wondered if I could add a Master volume to the Hi-gain side so when he switched channels he could balance the volume, and also if he could have an LED on the footswitch.
Again no problem, made the changes and added the new pot, and build this time an overcomplicated relay system with an opt-coupler controlling the relay and LED. Everything seemed great for awhile, but then the relay started cutting out and not holding open. I forgot to make changes to the power supply.
So as I started to figure what's the best way I could overcomplicate the PS, like I did the channel switching, I noticed that Ted Weber at (Weber Speakers had a channel switching board, for less then I've spent on the channel switching I made, plus ties into the 6.3ac heater line.
Why re-invent the wheel. I bought one, and took out the transformer and the channel switching circuit, and put the board in. perfect (ok still don't have an LED on the foot switch setup yet)
The amp.
Power Tubes: kt66's
preamp: (see my channel switching mod over at AX84 for the High-Octain project
clean ~ plexi style
OverDrive ~ High-octain style
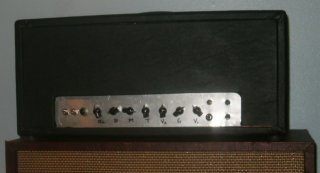
Front of the amp, you can still see the 3 holes from the old jacks
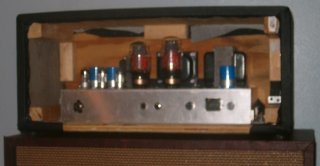
Back of the amp at a distance
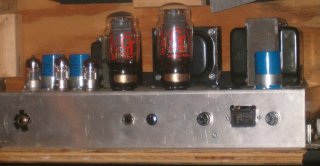
Closer up look at the back, black electerical tape is isolateing the foot switch from the chassis(what I had on hand
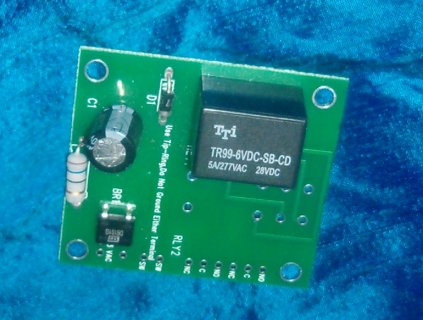
Weber relay board
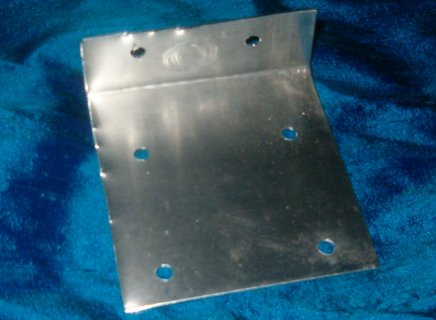
Thin piece of aluminum cut and bent to hold the relay board
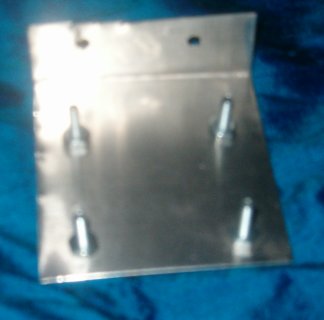
Mount with bolts to hold the board. using the nuts as spacers too
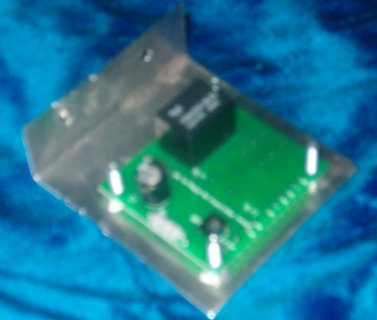
Just about ready to be put into the amp
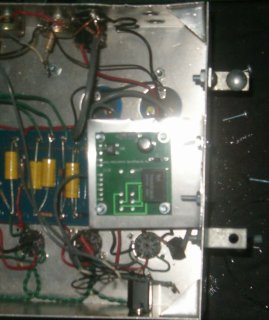
Board mounted into the amp, this board is floating about the preamp section of the turret board
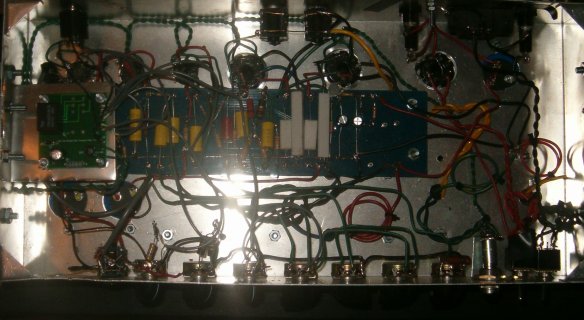 view of the amp with the board in it.
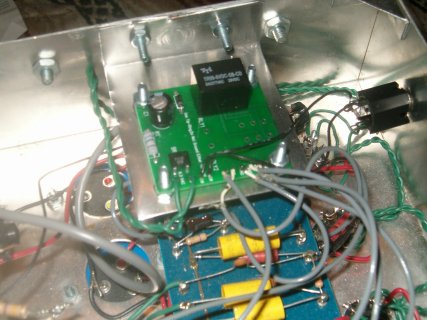 Close up of the install channel switching board.
Copyrighted 2006 to Bryan James